Published:
Last updated:
Direct answer: Printed latte art is a logo, photo, or other design printed onto the foam of a coffee drink — not a poster of latte art, and not a poured, freehand pattern.
A search for printed latte art often mixes two very different results: framed pictures, and a design printed on the drink itself. This how-to is for US cafe owners, baristas, hotel breakfast teams, and event staff who need the second of those: a stable way to print on coffee foam during service. Prepare a flat, dense foam, place the cup, print, and serve the drink promptly; use the linked pages if you need machine setup or buying advice.
Where this guide quotes CINOART product figures, those come from official specs. The foam, placement, and serving steps are practical bar advice you can adapt to your drinks.

What printed latte art is — and what it is not
Printed latte art is a design applied onto a prepared foam surface in the cup. It is not wall art, and it is not a class in pouring rosettas or hearts by hand.
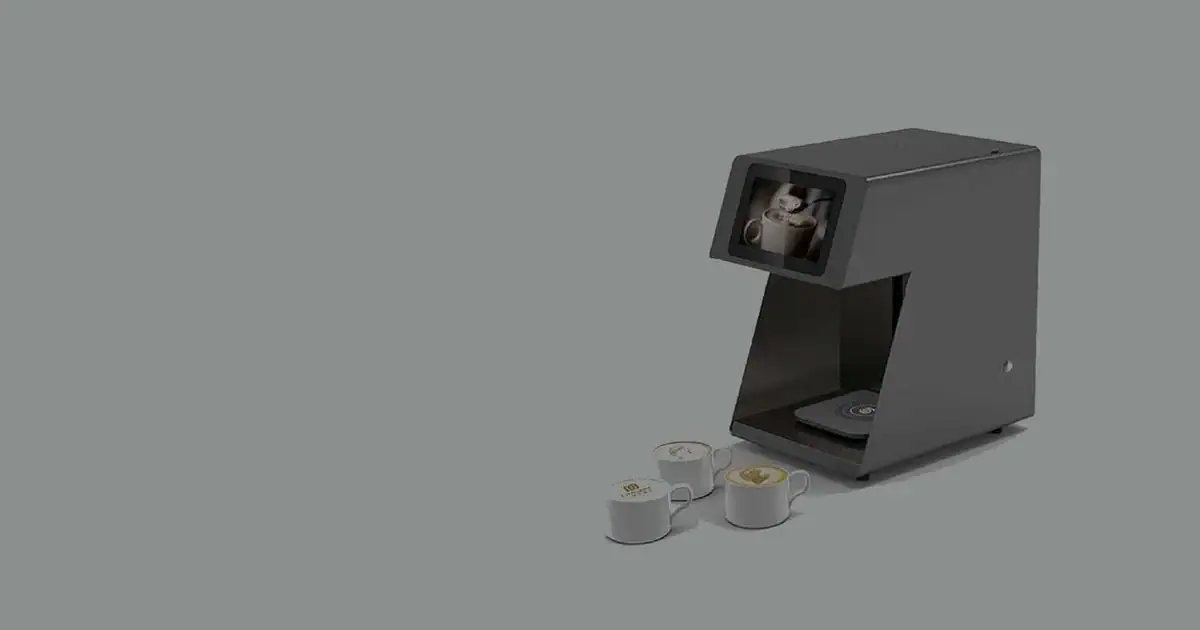
A coffee printer sits over a finished drink and deposits the image onto the foam. The barista still makes the espresso and the milk; the printer needs a flat, printable surface first. Poured latte art is a pattern made by pouring. Printed latte art is a logo, photo, or campaign image added after the foam is already in the cup.
This page covers foam, cup placement, serving, and troubleshooting. Buying advice and full machine setup have their own pages, linked later.
How to print on coffee foam, step by step
To print on coffee foam, prepare a flat, dense foam, choose a design that fits the foam surface, place the cup, print, and serve the drink promptly. The steps below stay on that workflow. For CINOART power-on, Wi-Fi, and file upload steps, set up the printer and upload a design on the existing how-to page.
Prepare a flat, dense foam
Start with a smooth, fine-textured foam layer — often called microfoam. The surface should look like a level, pale canvas, with no large bubbles, no dry peaks, and no liquid well in the center.
Steam or froth the milk so the bubbles are small and the foam is dense enough to hold a surface, then tap and swirl the pitcher to settle larger bubbles. Pour so the foam finishes level.
Tip: The foam must be level and must not rise above the cup rim. If the surface is uneven or the foam sits over the rim, do not print; pour again or rebuild a flat top. CINOART’s how-to page also asks you to make sure the foam top is flat before printing. Follow your bar’s usual milk procedure, then judge the surface by eye.
Choose and size the design
Pick a high-contrast logo, photo, or simple graphic that will still read on a small, round foam surface. Avoid tiny lettering, thin lines, and busy backgrounds. Keep the design inside the foam, not out to the ceramic rim.
To send the image from a phone, use the QR-code upload described later on this page. For the full setup and upload walkthrough, use the how-to page already linked above.
Place the cup and print
Place the cup on the printer tray so the foam sits level under the print head. Do not tilt the cup or rest it on a dripping saucer. Confirm that the foam still looks flat after you set it down; walking the drink across a busy bar can reopen bubbles.
Start the print and leave the cup still until the pass finishes. Per CINOART’s official specs, a print takes about 10–15 seconds; actual time varies with design and cup size. Do not move the cup early to “save time.”
Serve the drink promptly
Hand the drink over as soon as the print is complete. Foam continues to settle, dry, or form larger bubbles as it sits, and a good image can blur or drift if the cup waits on the pass. Serve on the same ticket, not after a long hold.
If you need a photo of the drink, take it immediately, then serve.
Which drinks work for printed latte art
Drinks that take printed latte art well have a pale, flat, stable foam layer. Lattes, cappuccinos, and other milk drinks with a smooth white or lightly colored top are the usual starting point.
A darker, broken, or very thin surface will hide contrast and let the image sink. Very stiff, dry foam can leave gaps. A drink with only a ring of foam and a wet center is a poor canvas.
Plant-based milks and thick cold foam can work when they form a stable, level layer. Results vary by product and by how the foam is made, so trial those drinks on your own menu before you promise them to guests.
CINOART also describes printing on other flat, stable surfaces, such as beer foam and some desserts. If you print on them, still start with a level top and serve promptly.
How to steam or pour foam that actually prints
The foam has to be printable, not just pretty in the pitcher. You want dense microfoam, a level top, and as few large bubbles as possible.
Texture the milk so it looks glossy rather than stiff or full of large pockets. After steaming, tap the pitcher and swirl, then pour a solid white surface and finish flat, without letting the foam rise above the cup rim. A poured heart or rosetta can still take a print if the top is level; a high ridge, a deep well, or foam over the rim will distort the image.
If large bubbles remain, they often show up as holes or speckles. Do not print over a broken surface; pour a new drink. For plant milks, use the same visual standard — a stable, flat layer — rather than assuming every carton will behave like dairy.
How to print a photo or logo on coffee
To print a photo or logo on coffee, use a high-contrast image, keep text large enough to read on the foam, and fit the design inside the printable surface. Print only after the foam is flat and the cup is still.

Simple, high-contrast logos usually hold up better than a paragraph of type. Photos work when the subject is clear at a small size; a busy or low-contrast picture will look muddy. At an event, check the crop on the preview, and keep a spare drink ready if the first foam falls apart.
To send a photo to the CINOART PRO-CT2, scan a QR code to open a web page, then pick any photo from the phone’s album — no image size requirement, no app to install, and no subscription fee. For the full setup and upload steps, use the how-to page linked earlier.
What goes wrong, and how to fix it
Most failed prints come from the foam or the cup placement, not from a need to reprint the same image at a higher resolution. Check the drink first.
- Foam that is uneven or sits above the rim. The foam must be level and must not rise above the cup rim. Skim or rebuild the top so it sits flat at or just below the rim, then print.
- Holes or speckles. Large bubbles in the foam leave gaps. Tap and swirl the pitcher, pour a new flat top, and print only when the surface looks tight and even.
- Blurred or fuzzy edges. The foam may be too wet, too thin, or still moving, or the cup may have been bumped mid-print. Rebuild a denser, level surface and leave the cup still until the print finishes.
- A pale or faded image. The foam layer may be too thin, or the surface may be too dark for the design’s contrast. Pour a paler, more even top, and use a higher-contrast version of the logo or photo.
- Text that is hard to read. The lettering is probably too small, too thin, or too similar in tone to the foam. Enlarge the type, simplify the layout, or drop the small caption.
- The design sits off-center or clipped. The cup may be off the tray mark, or the foam may be sloped so one side is closer to the head. Re-seat the cup on a level tray and confirm the foam is flat. For CINOART alignment tools and setup checks, use the how-to page rather than improvising in the middle of service.
- The image slumps after printing. The drink probably waited too long, or the foam was already separating. Serve immediately, and do not print ahead of a long hold.
If the same problem appears on every drink after the foam looks correct, check the machine setup for your model, or ask CINOART for support details.
When a cafe uses a coffee printer
Cafes, hotel breakfast rooms, and events use a coffee printer when they want the same logo, photo, or campaign image on foam, cup after cup. The value is a repeatable topping on a drink the bar already knows how to make, not a replacement for milk craft.
CINOART’s current in-sale model is the CINOART PRO-CT2. Per CINOART’s official specs, the PRO-CT2 prints at 600 dpi, in about 10–15 seconds per print (actual time varies with design and cup size), and fits cups 5–18 cm high (approximately 2.0–7.1 inches) and 3–11 cm in diameter (approximately 1.2–4.3 inches). It has CE/FCC/RoHS certification, Wi-Fi, and 100–240V power. The inch figures are approximate conversions from the metric specs.
Per CINOART, the PRO-CT2 warranty is 1 year, covering faults under normal use; ink cartridges are not covered. Delivery is usually 10–15 working days after payment. One cartridge makes about 800–1,000 cups. The ink is edible, made with FDA-compliant edible ingredients.
If you are choosing a machine, see the commercial coffee printer buying guide. For CINOART setup, cartridge handling, and the full upload walkthrough, use the how-to page already linked above.
Request a quote
If you want product details or pricing for the CINOART PRO-CT2, request a quote. We reply within 24 hours.
Q&A
What is printed latte art?
Printed latte art is a logo, photo, or other design printed onto the foam of a coffee drink. It is not a poster, and it is not the same as pouring freehand latte art.
The barista still prepares the espresso and the foam. The printer adds the image after the surface is flat and stable.
How do you print on coffee foam?
Prepare a flat, dense foam, choose a design that fits the foam surface, place the cup level on the tray, print, and serve the drink promptly. Do not print on a broken, sloped, or bubbly top.
On the CINOART PRO-CT2, scan a QR code to open a web page, then pick any photo from the phone’s album. There is no image size requirement, no app to install, and no subscription fee. For power-on and the full upload walkthrough, use the how-to page linked earlier.
Which drinks work best for printed latte art?
Drinks with a pale, flat, stable foam layer work best — typically lattes, cappuccinos, and similar milk drinks with a smooth top. Thin, dark, dry, or broken foam is a poor surface.
Plant milks and cold foam need the same visual standard. Trial them on your menu before you add them as a printed item.
How long does a printed latte art design take to print?
Per CINOART’s official specs, a print takes about 10–15 seconds; actual time varies with design and cup size. Foam preparation and serving still take their usual place in the ticket.
The seconds above refer to the print step, not the whole drink build.
What cup sizes can the CINOART PRO-CT2 print on?
Per CINOART’s official specs, the PRO-CT2 fits cups 5–18 cm high (about 2.0–7.1 inches) and 3–11 cm in diameter (about 1.2–4.3 inches). The inch figures are approximate conversions from the metric specs.
A tall cup still has to fit under the print head, so stay within that 18 cm height limit. If you are serving the drink to go, take the lid off before you print, then put the lid back on afterward. Those lid and clearance notes are practical serving tips, not additional product specifications.
How many cups does one PRO-CT2 ink cartridge print?
Per CINOART, one cartridge makes about 800–1,000 cups. The ink is edible, made with FDA-compliant edible ingredients.